Craving a sweet, refreshing dessert but don’t wanna fire up the oven? No-Bake Banana Split Cake is your answer! This easy, creamy, fruity delight has all the flavors of a classic banana split—without the hassle of baking. It’s the kind of dessert that’s perfect for hot summer days, last-minute potlucks, or when you just need a sugar fix but refuse to turn on the stove.
This article will walk you through everything you need to know: from the ingredients and step-by-step prep to fun variations and expert tips (because, let’s be real, there’s always that one trick that makes all the difference). By the end, you’ll be drooling and ready to whip up this dessert like a pro. Let’s jump in!
Introduction to No-Bake Banana Split Cake
What is a No-Bake Banana Split Cake?
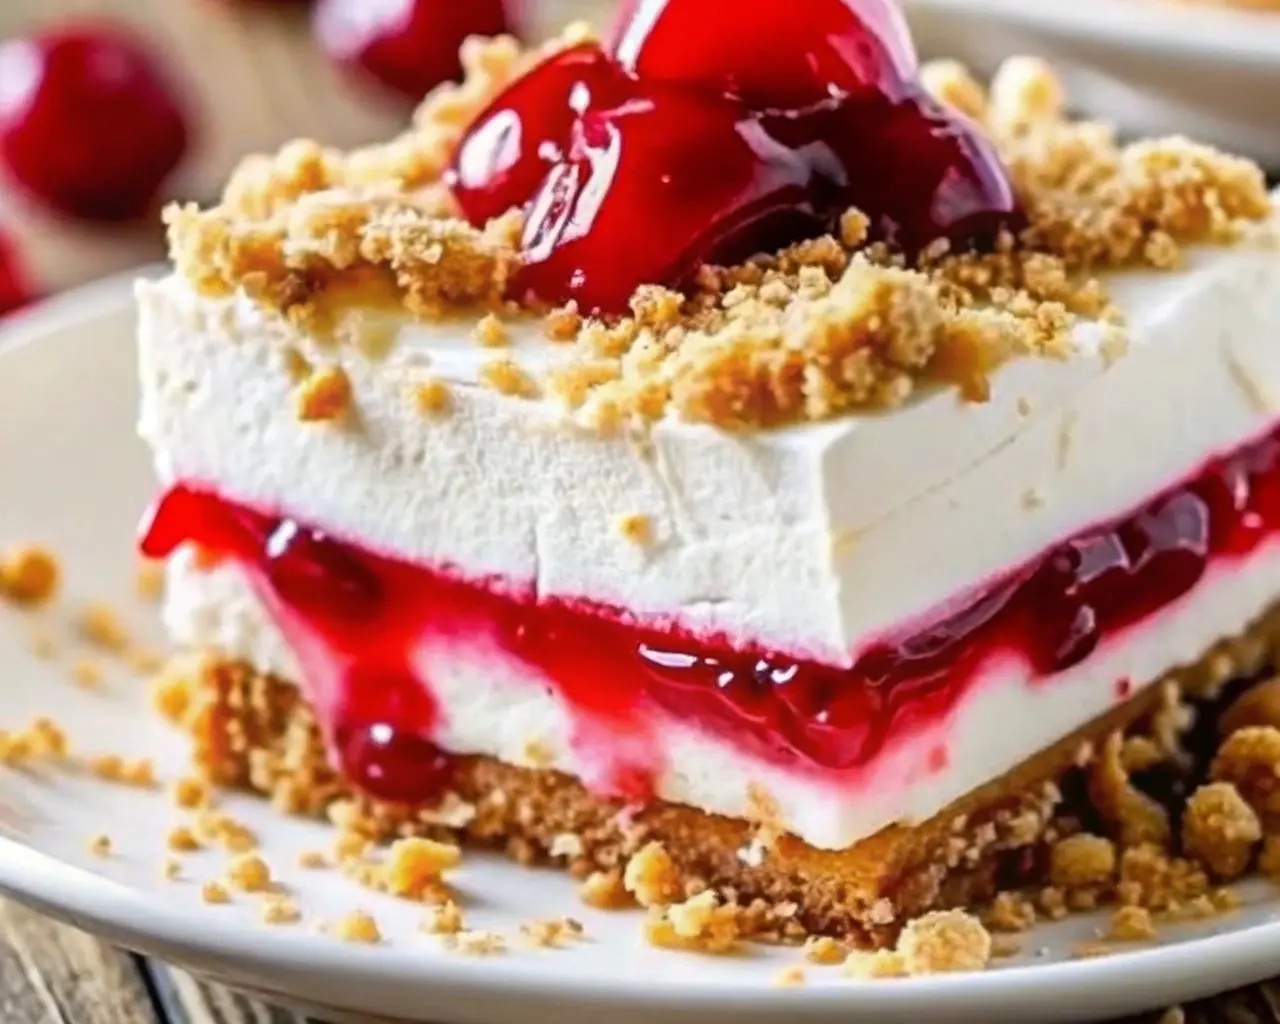
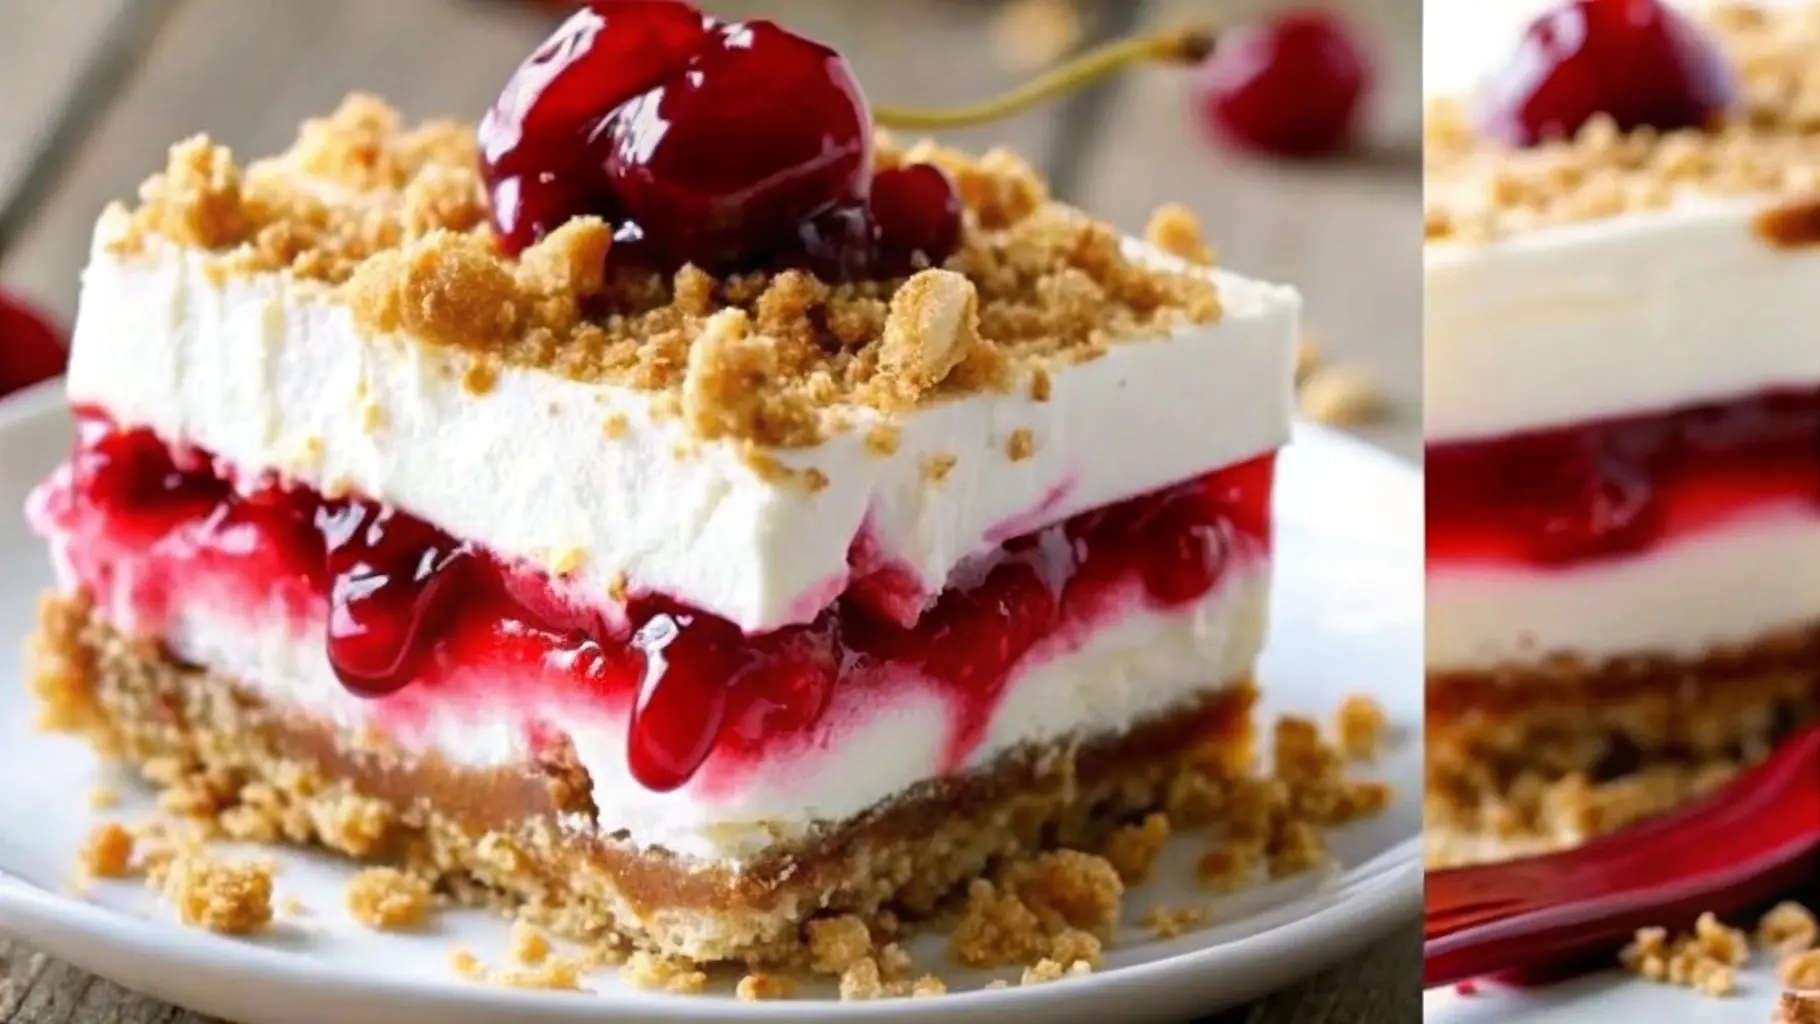
Imagine a classic banana split—bananas, whipped cream, chocolate syrup, cherries, and nuts—but in a creamy, no-bake cake form. That’s exactly what this dessert is! It’s got a buttery graham cracker crust, a smooth cream cheese layer, fresh bananas, crushed pineapple, and a dreamy whipped topping. And the best part? No oven required. Just mix, layer, chill, and dig in!
Origins and Popularity of the Dessert
Banana splits date back to the early 1900s, and ever since, people have been recreating the flavors in all sorts of ways—milkshakes, sundaes, even cheesecakes! The No-Bake Banana Split Cake is one of those genius inventions that took the best parts of the banana split and made them into a simple, crowd-pleasing dessert. It became a hit in potluck culture (because who doesn’t love a dessert that’s easy to share?), and it’s stuck around ever since.
Why Choose a No-Bake Dessert?
Who wants to crank up the oven when it’s blazing hot outside? Or spend hours waiting for a cake to bake when you need something sweet now? No-bake desserts are a lifesaver—especially this one. Here’s why you’ll love it:
✔️ Zero baking required—just chill and serve!
✔️ Tastes even better the next day!
✔️ Perfect for summer, potlucks, and weeknight cravings!
✔️ Super easy to customize with your favorite toppings!
This dessert is so easy, it’s almost unfair. Stick around, because next up, we’re breaking down everything you need to make this no-bake masterpiece.
Essential Ingredients for No-Bake Banana Split Cake
Graham Cracker Crust
The foundation of any good No-Bake Banana Split Cake is a solid, buttery crust. And guess what? It’s ridiculously easy to make.
Ingredients and Preparation
- Graham cracker crumbs – You can crush your own or buy pre-crushed ones (because, honestly, why make life harder?).
- Melted butter – The glue that holds the crumbs together.
- Sugar – Just a little to sweeten things up.
Mix it all together, press it firmly into a baking dish, and pop it in the fridge to set. That’s it! No baking, no stress.
Cream Cheese Layer
This is where the magic happens! The creamy layer gives this dessert its rich, cheesecake-like texture.
Ingredients and Preparation
- Cream cheese – Softened to make it smooth and spreadable.
- Powdered sugar – Blends easily without making the mixture grainy.
- Vanilla extract – Adds just a little something-something to bring out the flavors.
- Whipped topping – Lightens up the mixture and makes it fluffy.
Beat everything together until it’s silky smooth, then spread it over the crust. Boom—done!
Fruit Fillings
Now, it’s time for the fruity goodness that makes this dessert taste just like a banana split!
- Bananas – Sliced fresh for that classic banana split flavor.
- Crushed pineapple – Adds a little tropical tang. Just drain it well so your cake doesn’t get soggy.
- Optional: Strawberries – Not traditional, but hey, why not?
Toppings
This is where you can really have fun. A banana split isn’t complete without toppings, so don’t skimp!
- Whipped topping – Because more whipped cream is never a bad thing.
- Chopped nuts – Pecans or walnuts work great for crunch.
- Maraschino cherries – A must for that classic look!
- Chocolate syrup – Drizzle generously. Trust me.
Step-by-Step Preparation Guide
Preparing the Graham Cracker Crust
First things first—get that crust ready.
Mixing and Pressing the Crust
In a bowl, mix together the graham cracker crumbs, melted butter, and sugar until it looks like wet sand. Press it firmly into the bottom of a 9×13-inch dish. The trick? Use the bottom of a measuring cup to pack it down evenly.
Chilling the Crust
Pop the dish into the fridge for at least 15–20 minutes. This helps the crust set and keeps it from falling apart when you cut into the cake.
Creating the Cream Cheese Layer
Now for the good stuff!
Mixing Cream Cheese with Sugar
In a large bowl, beat the softened cream cheese with the powdered sugar and vanilla extract until smooth. No lumps allowed!
Spreading Over the Chilled Crust
Gently spread the cream cheese mixture over the chilled crust. Go slow—nobody wants the crust breaking apart!
Adding the Fruit Layers
Time to bring in those classic banana split flavors.
Slicing and Layering Bananas
Slice bananas into thin rounds and arrange them in an even layer over the cream cheese filling.
Draining and Adding Crushed Pineapple
Drain the crushed pineapple really well, then sprinkle it over the bananas. If you’re adding strawberries, now’s the time to slice and layer them, too.
Applying the Whipped Topping
Spread the whipped topping gently over the fruit. Use a spatula to smooth it out, covering everything.
Final Touches
The grand finale!
Sprinkling Nuts
A handful of chopped pecans or walnuts adds a little crunch—just like in a real banana split.
Placing Maraschino Cherries
Scatter those bright red cherries on top for a pop of color (and nostalgia).
Drizzling Chocolate Syrup
Finish it off with a generous drizzle of chocolate syrup. It’s the cherry on top—literally!
Now, all that’s left to do is chill it for a few hours (or overnight if you can wait that long). Up next—fun twists and variations to make this dessert even better!
Variations and Customizations
One of the best things about a No-Bake Banana Split Cake is that you can tweak it to fit your taste (or whatever you have in your kitchen). Whether you want to switch up the crust, lighten it up, or go all-out decadent, there are tons of ways to make this dessert your own.
Alternative Crust Options
Not a fan of graham crackers? No worries—there are plenty of tasty swaps.
- Oreo crust – If you love chocolate (who doesn’t?), crush some Oreos and mix them with melted butter. It gives the dessert a cookies-and-cream vibe.
- Vanilla wafer crust – A little sweeter than graham crackers but still pairs perfectly with the creamy layers.
- Pretzel crust – Want a salty-sweet combo? Crushed pretzels add a delicious crunch and a hint of saltiness.
Dairy-Free or Healthier Alternatives
If you’re looking for a lighter or dairy-free version, try these simple swaps:
- Use dairy-free cream cheese and whipped topping – Brands like Daiya or Kite Hill make great alternatives.
- Swap out the sugar – Use honey or a sugar substitute to cut down on sweetness.
- Try Greek yogurt – Replace half of the cream cheese with plain Greek yogurt for a tangier, protein-packed filling.
Fun Flavor Twists
Feeling adventurous? Here are some fun ways to switch things up:
- Peanut Butter Lover’s Dream – Drizzle peanut butter over the whipped topping, or mix a little into the cream cheese layer.
- Chocolate Explosion – Add mini chocolate chips to the cream cheese layer or sprinkle them on top.
- Berry Banana Split – Swap the pineapple for fresh raspberries or blueberries for a fruity twist.
No matter how you customize it, this No-Bake Banana Split Cake is guaranteed to be a hit!
Serving, Storage, and Pro Tips
Once your masterpiece is ready, you might be wondering—how do I serve and store it properly? Good news: this dessert is super forgiving and gets even better as it chills.
How to Serve No-Bake Banana Split Cake
This cake is best served cold and fresh!
- Chill before serving – Let it sit in the fridge for at least 4 hours (overnight is even better). This helps the layers set so you get clean, perfect slices.
- Use a sharp knife – Run it under warm water before slicing to make cutting easier.
- Serve with extra toppings – Want to really impress? Add a scoop of vanilla ice cream or a drizzle of caramel sauce before serving.
Best Way to Store Leftovers
If you somehow don’t finish the whole thing in one sitting (hey, no judgment!), here’s how to keep it fresh:
- Fridge: Store leftovers in an airtight container for up to 3 days. The bananas may brown slightly, but the flavor will still be amazing.
- Freezer: Want to make it last longer? Freeze individual slices for a quick grab-and-go dessert. Just thaw in the fridge before serving.
Common Mistakes to Avoid
Even though this recipe is super easy, there are a few pitfalls to watch out for:
❌ Not draining the pineapple – Too much liquid = soggy cake. Drain it really well!
❌ Skipping the chill time – The layers need time to set, or you’ll end up with a messy (but still delicious) dessert.
❌ Overloading with toppings – Go easy on the chocolate syrup and nuts to keep everything balanced.
That’s it—your No-Bake Banana Split Cake is now ready to wow everyone!
For more delicious desserts, check out our other recipe articles and get inspired!
Frequently Asked Questions (FAQs)
Even though making a No-Bake Banana Split Cake is super simple, you might still have a few questions. Here are the most common ones—answered!
Can I make No-Bake Banana Split Cake ahead of time?
Absolutely! In fact, it tastes even better when made ahead because the flavors have time to blend together. Just assemble everything, cover it tightly, and refrigerate overnight. This way, the layers set perfectly, and the crust firms up.
How do I keep the bananas from turning brown?
Bananas tend to brown when exposed to air, but here’s how to keep them fresh: • Use lemon juice – A light brush of lemon juice on the banana slices slows down browning without changing the taste. • Layer strategically – Since the bananas are tucked between layers, they’re naturally protected from air exposure. • Serve fresh – If possible, slice and add the bananas right before serving.
Can I freeze No-Bake Banana Split Cake?
Yes, but with a few adjustments! If you plan to freeze it, skip the fresh bananas and whipped topping (they don’t freeze well). Instead, freeze just the crust and cream cheese layers. When you’re ready to serve, add fresh bananas and toppings.
What can I substitute for crushed pineapple?
Not a fan of pineapple? No problem! Try these alternatives: • Mango chunks – For a tropical twist. • Strawberry slices – Keeps the banana split vibes going. • Caramelized peaches – Adds a little extra sweetness.
Wrapping It Up—Final Thoughts
And there you have it—everything you need to make the most delicious No-Bake Banana Split Cake! This dessert is a game-changer when you want something sweet but don’t feel like baking.
To recap:
✔️ It’s easy – No baking, no fancy equipment, just simple ingredients.
✔️ It’s versatile – You can tweak the recipe to fit your taste.
✔️ It’s a crowd-pleaser – Whether it’s a family gathering, BBQ, or a random Tuesday, this cake always hits the spot.
So, what are you waiting for? Grab those bananas, mix up that creamy filling, and get ready to impress your friends and family with this no-fuss, no-bake masterpiece!
For more easy, no-bake desserts!